


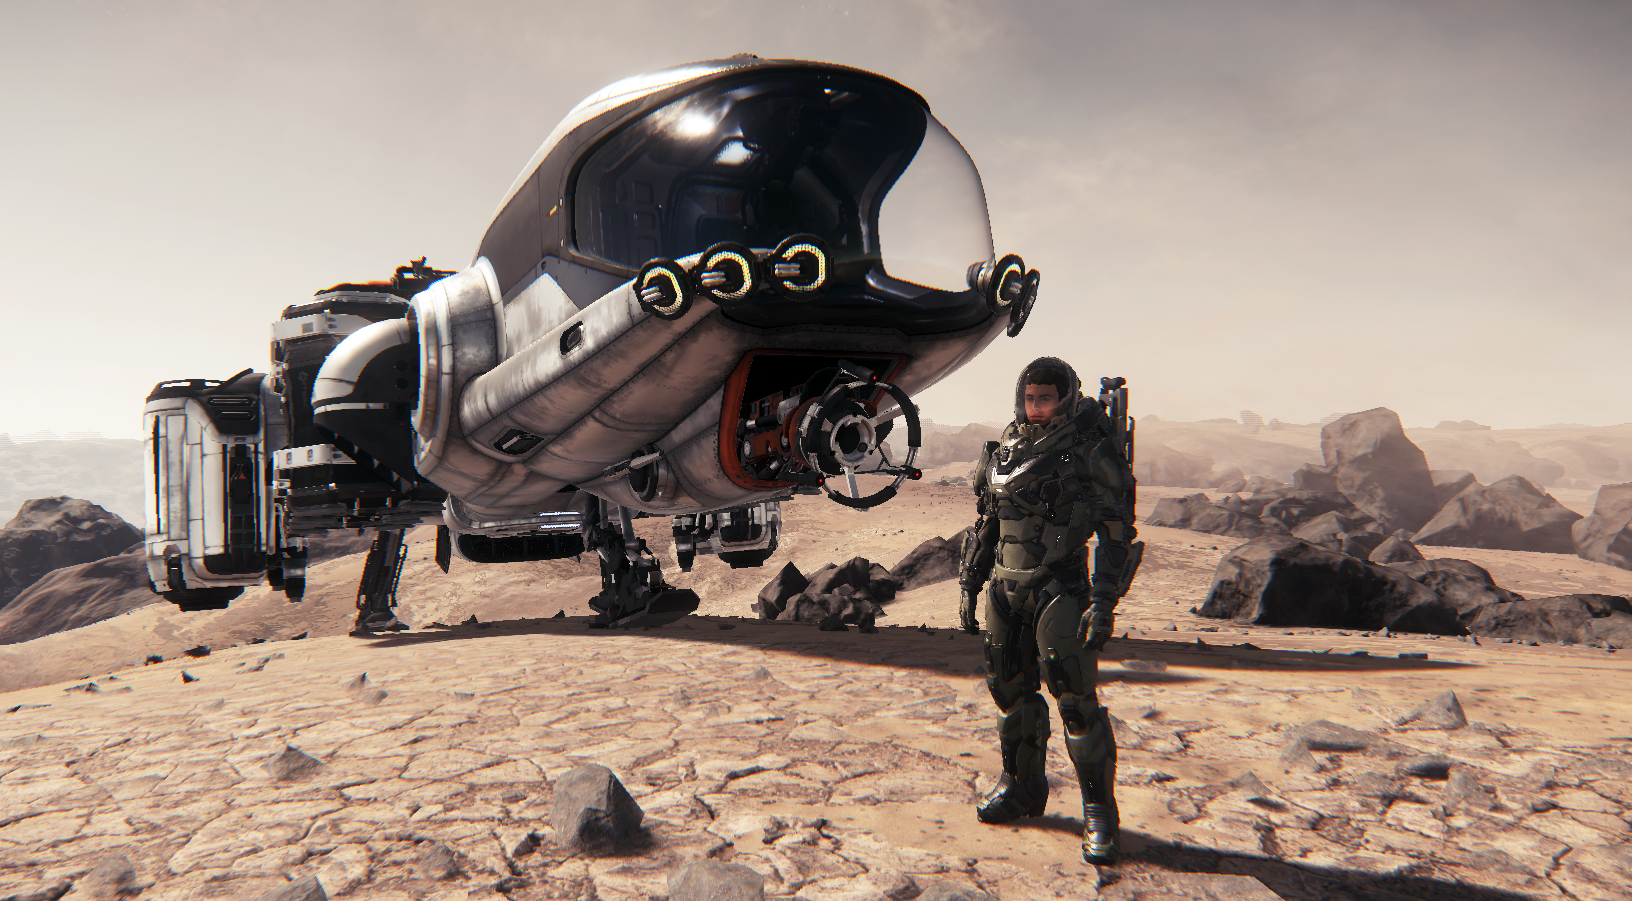
As was CIG’s intent, mining will not support AFK behavior. They want all professions to be engaging and require some level of interaction by the player. They want there to be skill involved, in this case, monitoring and muscle memory are a factor in the outcome. For this first release, we can only mine on moons, asteroid mining will arrive later. Using the Prospector, there are (4) parts to the mining mechanic once you arrive at your desired location.
Edit June 26, 2018: Click Here for Enhanced Step-by-Step Video Version Available on YouTube
Step One – Scan the Area
Your first step is to scan the area for minable objects.
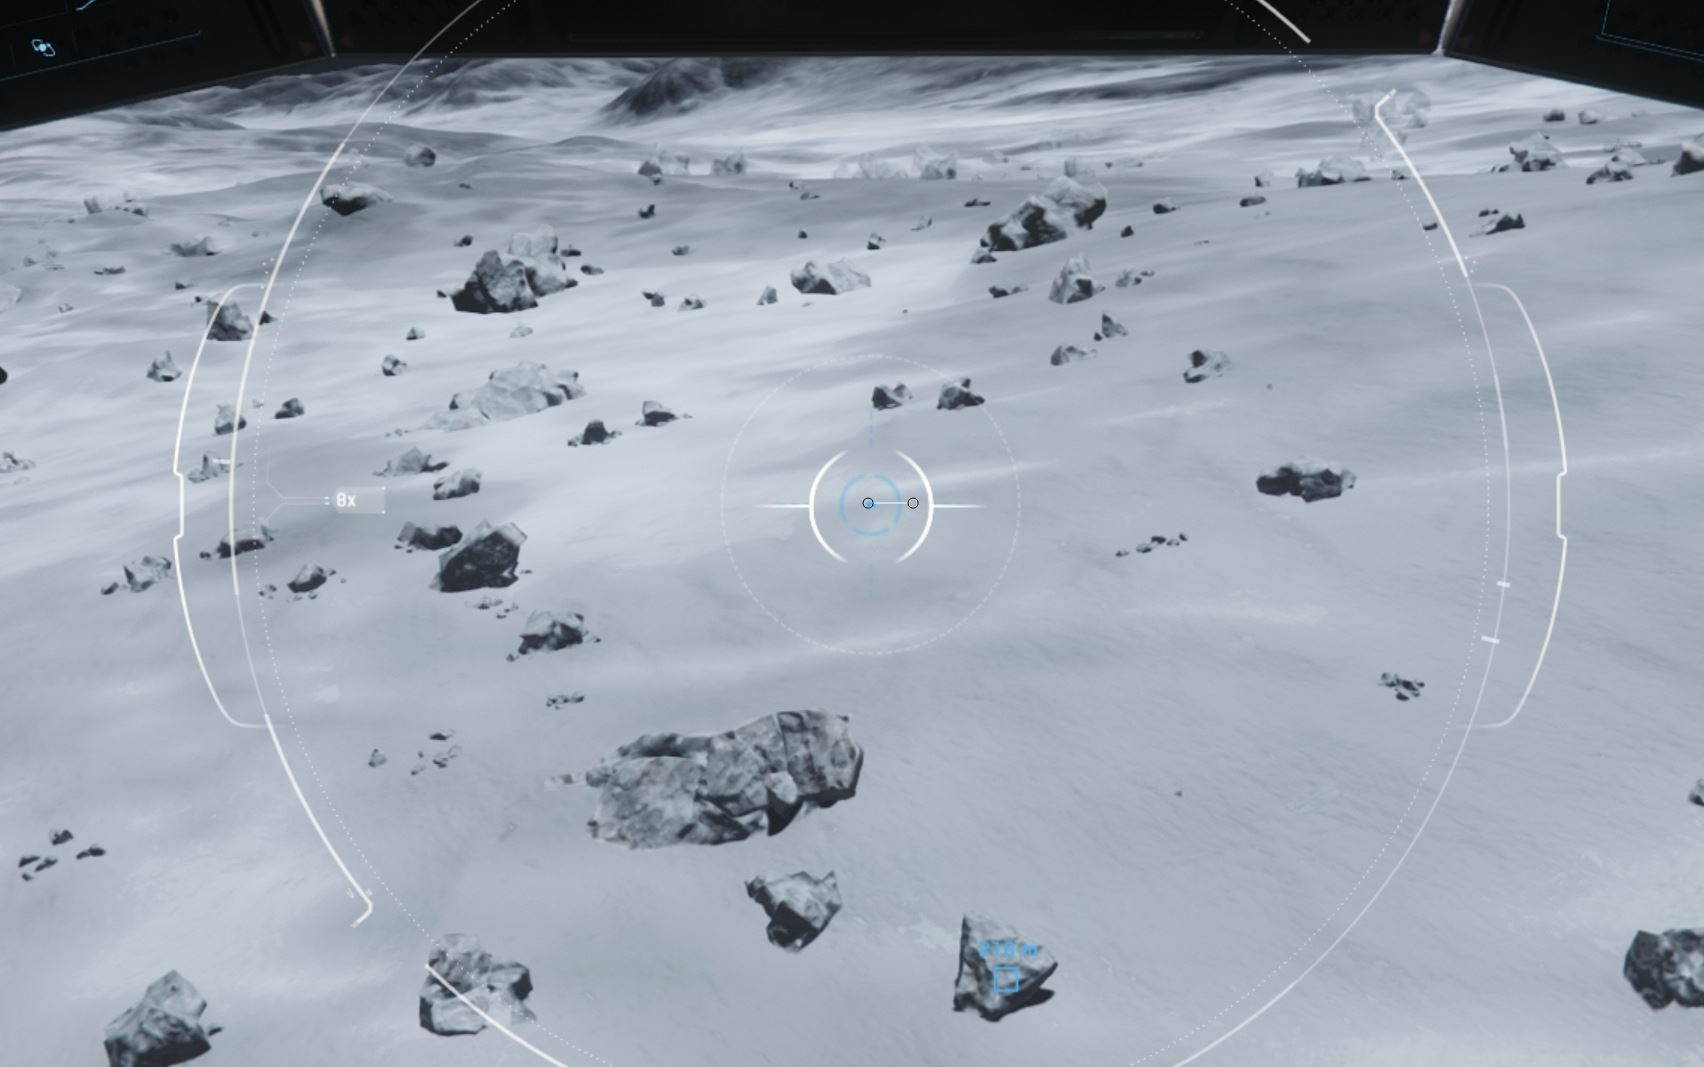
- Toggle scan mode using the [TAB] key
- Click the left mouse button to scan/ping the area.
- Land the ship or float slowing over the surface of the moon pinging as you go.
- Mineable rocks will be marked with a blue icon and orange outline.
Step Two – Start Mining Rocks
The next step is to fracture the rocks down into smaller units that can be extracted.
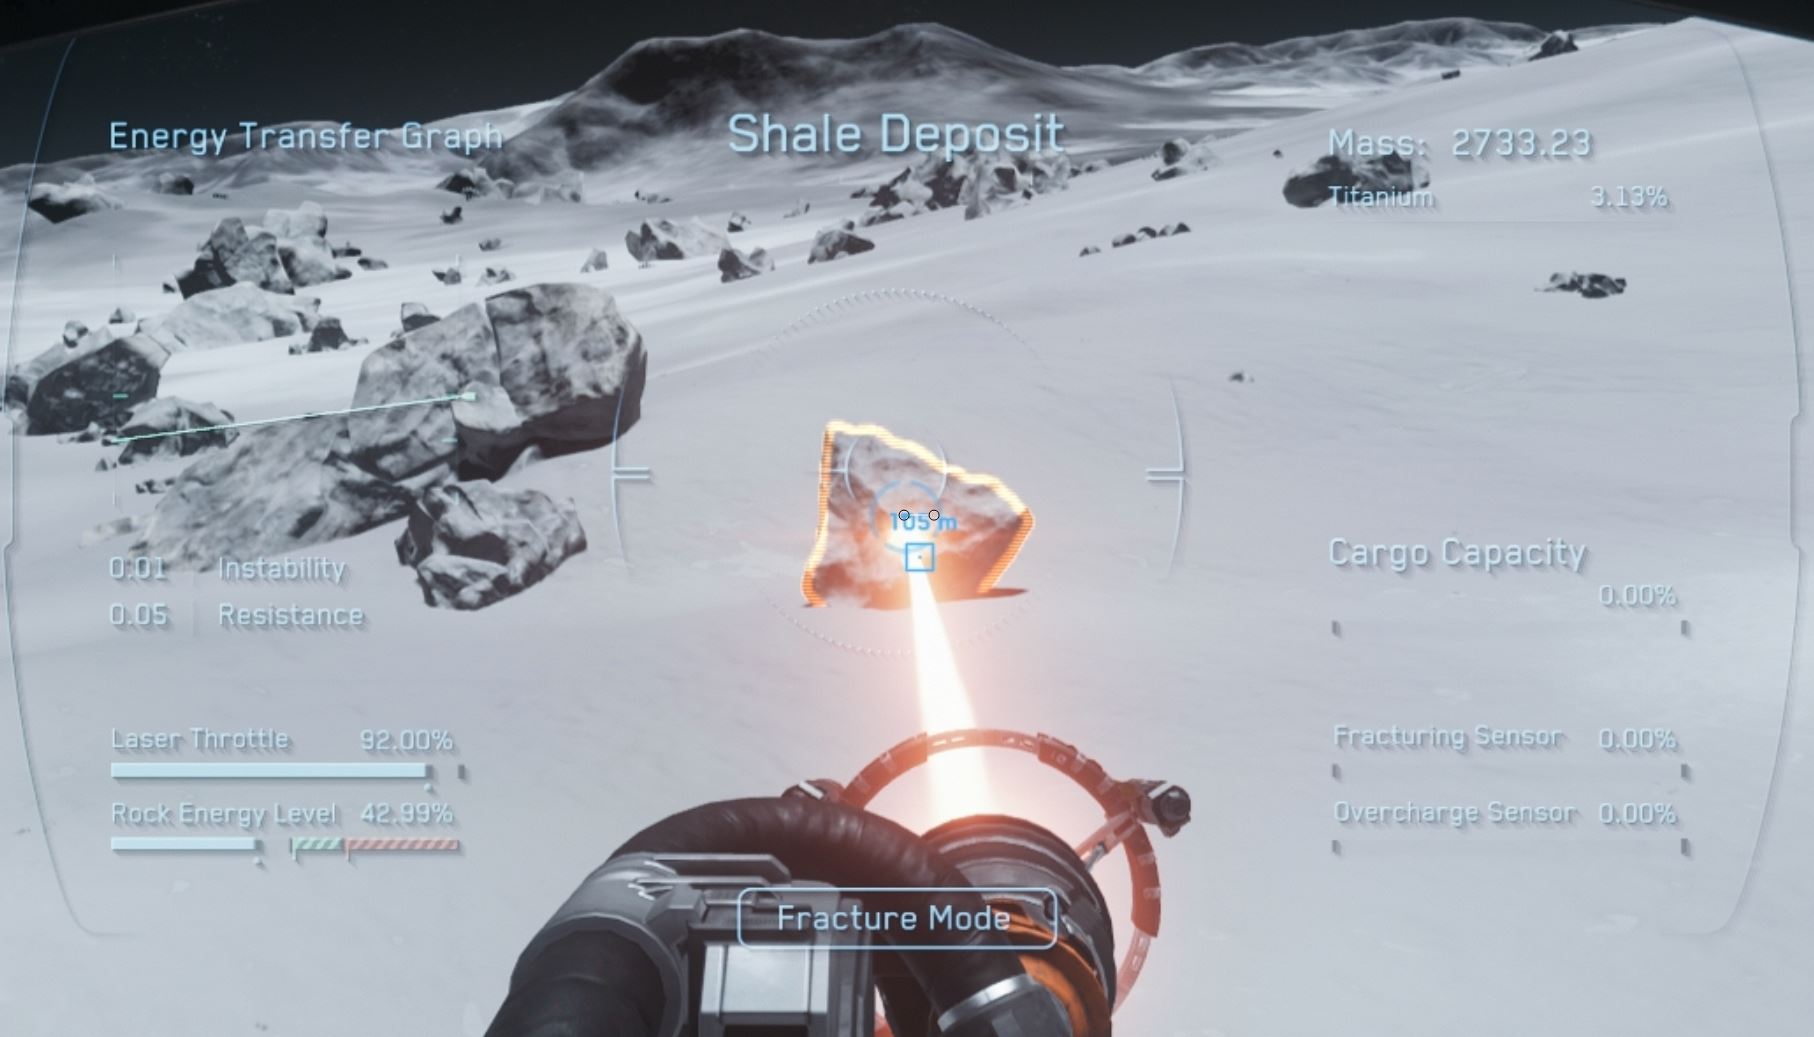
- Hover over the rocks identified as mineable to view their composition. You want to spend your time mining rocks that contain the highest concentration of sellable materials. Even better, are those that contain decent percentages of multiple metals.
- To mine, press the [M] key which activates the mining mode called Fracture.
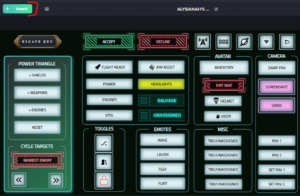
- Fracturing is a mini-game of heating the rock enough to break it into pieces without blowing it up. In order to accomplish this, you must watch the two gauges on the left part of the HUD.
Step Three – Control the Mining Laser
- The mouse scroll wheel controls the mining laser intensity
- Watch the Laser Throttle indicator to see your laser intensity setting.
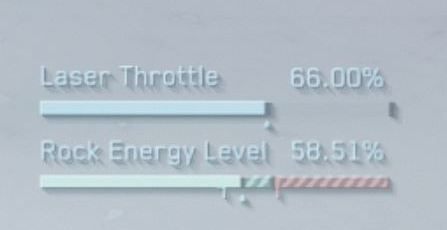
- Simultaneously, monitor the Rock Energy Level.
- The Energy Gauge measures the rock’s internal temperature for combustibility.
- Gradually increase the laser throttle until the rock’s internal temperature moves into the green zone on the Rock Energy Level.
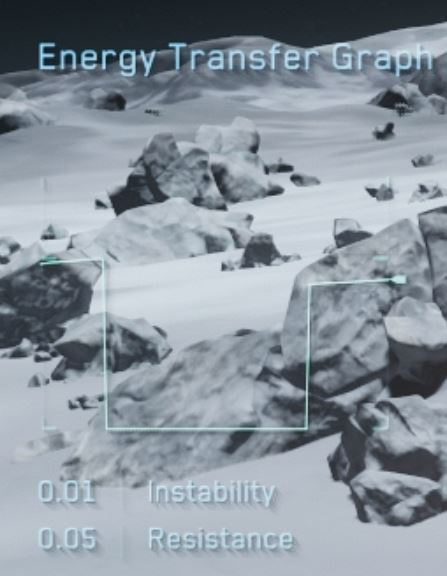
- Watch the Energy Transfer Graph (line chart) to see the trending effect of your current throttle setting. Is it stable – showing a flat line? Is it increasing – line trending up? Is it decreasing – line trending down? Use that to guide whether or not you need to increase, decrease or maintain your current laser throttle setting.
- Once you’ve moved the Energy Gauge into the green zone, hold it there until the Fracturing Sensor on the right side of the HUD reaches 100%.
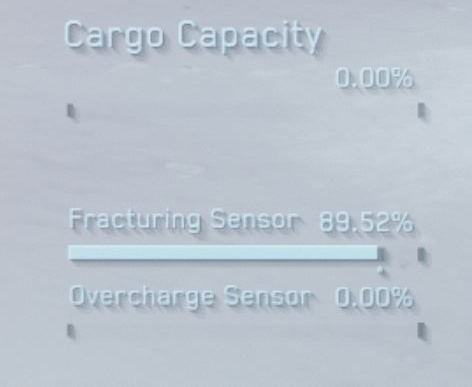
- At 100%, while in the optimum energy zone, causes a successful fracture.
Note: If you overheat the rock it will explode causing damage to nearby objects, including your ship.
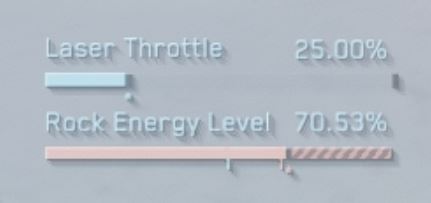
To avoid overheating the rock you should be slowly ramping up the throttle on the mining laser, watching to see how that impacts the rock’s energy and throttling the laser up and down as appropriate. You’ll hear a warning sound if the internal temperature is getting too high. If throttling down isn’t letting it cool fast enough, turn off the laser or point it away from the rock until it cools down a bit.
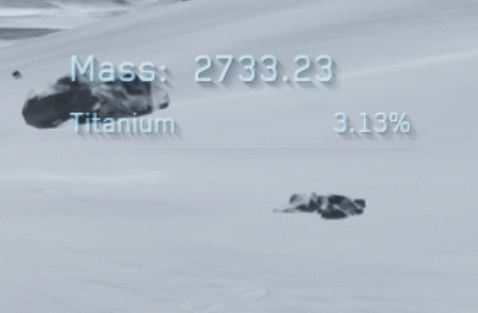
Step Four – Extract Ore
When you’ve fractured a rock successfully, it splits into smaller pieces.

- Hover over the fractured pieces to locate ones with a purple outline.
- Click the right mouse button to active Extraction Mode.
- Extraction will vacuum up the smaller pieces into the Prospector’s cargo canisters.
- Any rocks that still have an orange outline will have to be fractured further before you can extract the ore.
RECAP
In a nutshell, you
- Scan for mineable rocks
- Inspect them to find the best compositions
- Switch to mining mode
- Use the fracture laser to break the rock into smaller pieces.
- Monitor the rock’s internal heat temperature and control the laser throttle accordingly until the energy bar is sitting in the green zone
- After a successful fracture, toggle to the extraction laser to vacuum up your earnings.
Like most things in games, the harder it is the bigger return. For now, at least, Cellin has the lower level metals so it’s easier to learn the basics of mining there. Whereas Daymar has the more lucrative materials making them harder to mine successfully. This is likely to change over time as CIG rolls out more of the mineable components. Either way, mining isn’t as complicated as it sounds on paper. You’ll have the hang of it in no time. Head on over to Cellin and enjoy!
You may also be interested in:


1 thought on “Alpha 3.2 Prospector Mining Guide”
Comments are closed.